April 19, 2008 - Side Backing Strips

I'm happy with the fit along the sides between the top and lower cowls so it's time to work on the side backing strips.  I had previously cut to length and edge-smoothed two strips.  I marked 1/2" from the lower edge of the backing strip and used this line to clamp the backing strip to the lower cowl.  This 1/2" overlap will get riveted to the lower cowl. 
 
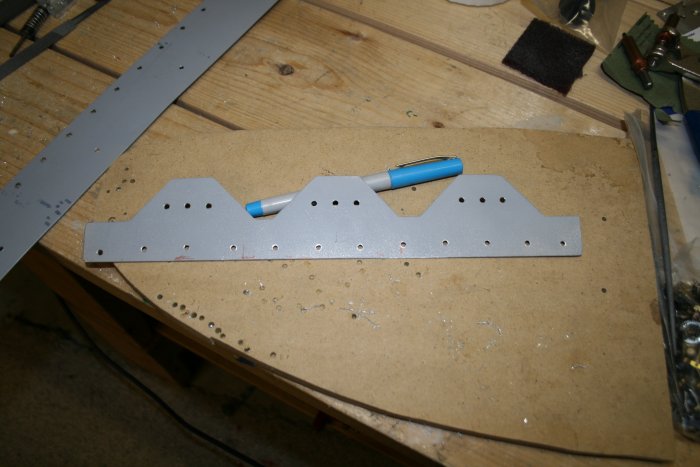
Then I started drilling to #40 - a hole every inch. 
 
All done.  About 20 holes I think. 
 
I put the top cowl back on to make sure it would fit over the backing strip.  Everything looked good.
 
I drilled both sides.  Then it was countersinking time.  20 holes each side.  I was almost done when the tip of my countersinking bit broke off.  I ordered another one from Avery Tools - will have wait a few days for it.   In the meantime, there are plenty of other things to do. 
 
I started working on the Camloc installation.  The recepticals get riveted to the backing strips.  The kit came with the below little template for drilling the recepticle mounting holes.  The kit had come with 1/8" Cherry pop-rivets and I was wondering what they were for.  Regular nutplates rivet on with 3/32" rivets but the below template is for 1/8".  It finally dawned on me that the Camloc recepticals get riveted on with the Cherry rivets. 
 
Using the template, I drilled all the mounting holes in the backing strips. 
 
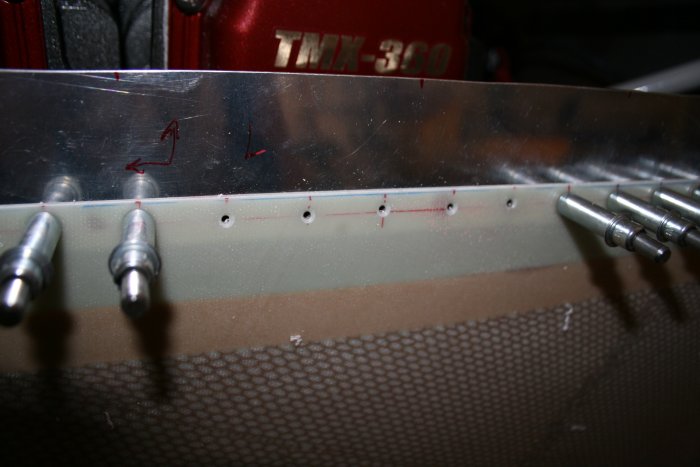
The next step will be to use a second template to open up the middle holes with the Unibit. 
 
Previous
Home
Next